How to deploy Spring Boot War in Docker
Setup Spring Boot Rest API war in Docker
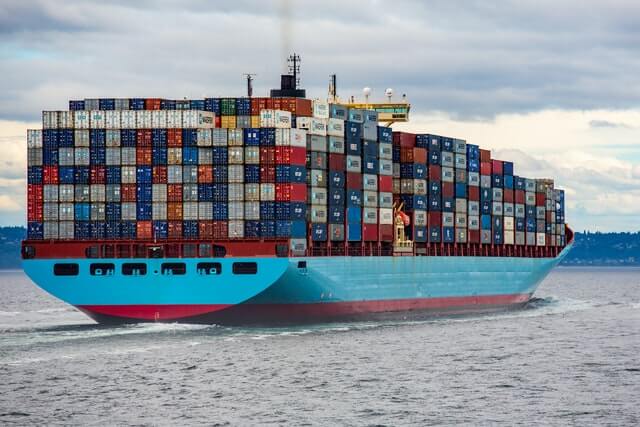
Now you’re thinking of containerizing your application.
This blog will guide you in deploying spring boot war to docker image.
Docker Intro
Docker is a platform-as-a-service tool (PAAS) that provides virtualization on OS level called containers. It uses some common OS libraries but overall each container is isolated from one another.
Lets go about setting up docker.
Docker Installation
- Firstly, begin by installing
Docker Desktop.Docker Desktopis an easy to use application for Mac or Windows that enables us to run containerized application - Go to
https://docs.docker.com/get-docker/to install docker. - Install docker based on your OS and follow the instructions mentioned.
- Once docker is installed, check if installation is correct by opening up the terminal and type in below command,
docker -v
If docker is installed correctly, docker version will be displayed.
Docker cheatsheet
Some commonly used docker commands and their uses are as follow,
Get Docker Version :
docker version

Information regarding docker :
docker info

Clone Image from Docker Hub :
docker image pull {image_name:veriosn}

Listing all images present in your local docker:
docker image ls

Remove Image from Docker :
docker image rm {image_name}

Create a new Docker Container :
docker container create --publish {image_file_expose_port:local_machine_port} --name {container_name}

List all containers in your docker :
docker container ls

To start container in your docker :
docker container start -it {container_name}

Stop container in your docker :
docker container stop {container_name}
docker container stop {container_id}

Remove container in your docker :
docker container rm {container_name}
docker container rm {container_id}

Force remove container while it is still in process/running
docker container rm -f {container_name}

Create image file for your application :

docker image build -t {your_name/image_name} ./

Deploy application image in your docker :
docker container run -it --publish 8081:8080 your_name/some-app-image Your application will be running in docker container.
Spring boot application example
REST application
Lets create a simple spring boot application which can be deployed in docker.
-
Go to
Spring Boot initializersite -
Give a custom Group, Artifact and Name for your application
-
Add
Spring Webdependency and click onGenerate
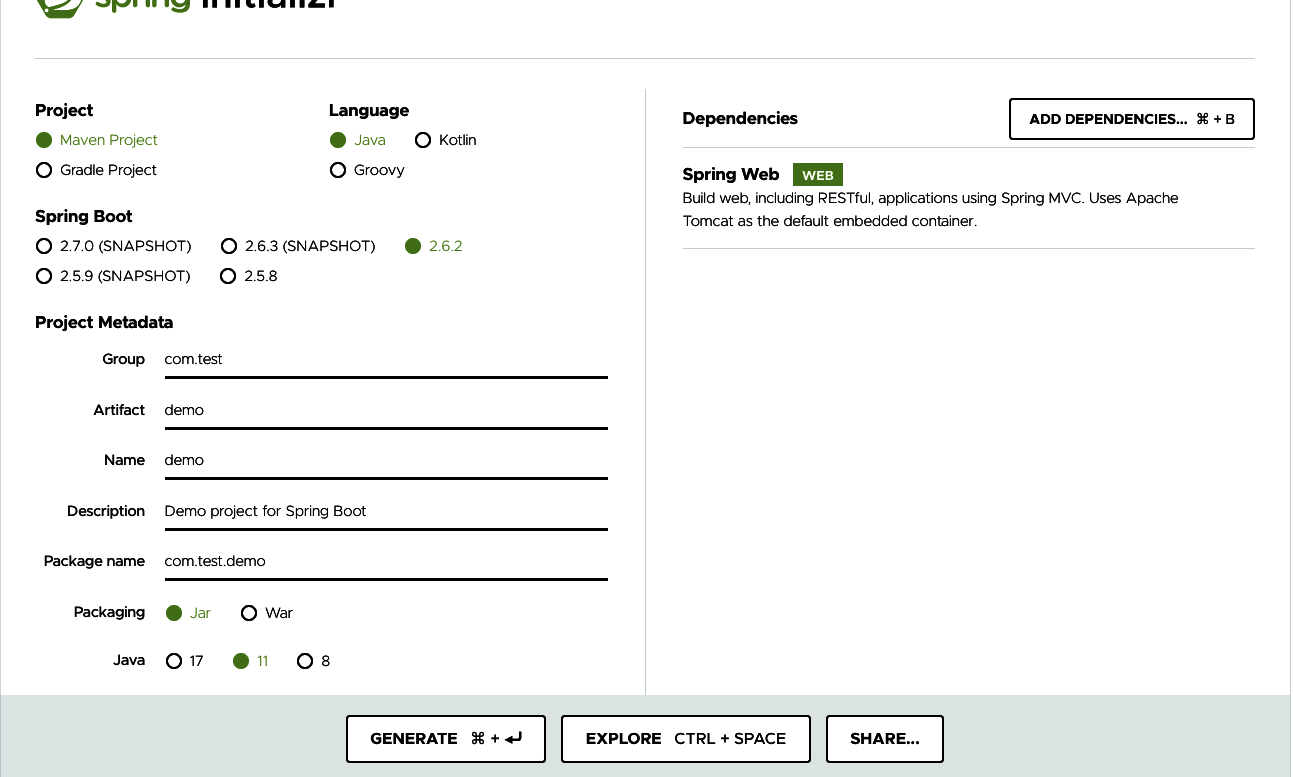
Spring Initializer Screenshot
- Open any IDE and import the Maven Project
- Create new class
TestController. Add below code,
package com.test.demo;

import org.springframework.web.bind.annotation.RequestMapping;
import org.springframework.web.bind.annotation.RestController;

@RestController
public class TestController {
	@RequestMapping(value = "/test")
	   public String getTest() {
	      return "Test";
	   }
}
- Then run the application as a Java application, you should be able to see something like below at
http://localhost:8080/test

Localhost Screenshot
Spring boot and docker configuration
Now its time to run the above code in docker bundled with Tomcat.
Lets first convert the above code to War from Jar.
Go to pom.xml and add below tags,
<packaging>war</packaging>
Then do Run As Maven Clean and Run As Maven Install
This creates the project war. In my case it is named as demo-0.0.1-SNAPSHOT.war and is present in target location.
Rename this war as app.war
Docker file
For spring boot to run we need Tomcat to be present.
In this example we will use Tomcat 8.5. The tomcat image needs to be downloaded to our docker.
Create a docker file named DockerFile in your spring boot project
#Create Image
FROM tomcat:8.5
COPY target/app.war /usr/local/tomcat/webapps/app.war
RUN sh -c 'touch /usr/local/tomcat/webapps/app.war'
ENTRYPOINT [ "sh", "-c", "java -jar /usr/local/tomcat/webapps/app.war"]
Lets go through above code line by line,
-
In the first line,
tomcat 8.5is downloaded -
Next the
app.warpresent in target is copied -
In the third
RUNstep, image is built. The state of the container after theRUNcommand will be committed to the image. -
Here
ENTRYPOINTinforms docker how to start the docker.In docker there is
ENTRYPOINTandCMD. Both do more or less the same but with subtle differences.
Below link provides good answer on difference between RUN and CMD
Difference between RUN and CMD in a Dockerfile
Also check below link to know the difference between CMD and ENTRYPOINT
https://www.ctl.io/developers/blog/post/dockerfile-entrypoint-vs-cmd/
Coming back to our setup, once docker file is created run below commands,
- Go to spring boot application folder location and run below commands in your terminal
docker image build -t test/demo .
- Above command creates the docker image. Now we need to run the docker image. For that run below command
docker container run -it --publish 8081:8080 test/demo
Complete code can be found at below location
https://github.com/chiragsp91/dockerWar
So that’s how to go about setting docker container for Spring boot war. Hope this article helps in setting up Spring Boot war in docker.
For more articles related to Java checkout Java Articles