How to build a website in under 10 minutes
A tutorial on how to deploy website quickly using Hugo framework
A static website is website where pages are generated in server side and same is served to client side. This can be a quick and easy way to setup a website. This allows developers to decouple front end and content. It provides the ability to run a website without setting up a database.
This can be perfect for a blog website. In this article I’m going to explain how build a Blog and I will be using Hugo framework to achieve it.
Hugo is one of the popular framework for setting up static websites.
Lets look into how to install Hugo
Site Setup
1. Windows
- Download the latest zipped Hugo executable from the Hugo Releases page.
- Extract all contents to
..\Hugo\binfolder. - The
hugoexecutable will be named ashugo_hugo-version_platform_arch.exe. Rename that executable tohugo.exefor ease of use. - In PowerShell or your preferred CLI, add the
hugo.exeexecutable to PATH by navigating toC:\Hugo\bin(or the location of hugo.exe file) and use the commandset PATH=%PATH%;C:\Hugo\bin. If thehugocommand does not work after a reboot, you may have to run the command prompt as administrator.
2. MacOS
You can install Hugo using homebrew. Use below command.
brew install hugo
To verify Hugo install
hugo version
To create new site use below command,
hugo new site sitename
The above command will create a new Hugo site in folder sitename.
Add content to Hugo
To create a new post, go to ‘Content’ folder and create a .md file.
Or use below new command to create new post
hugo new posts/my-first-post.md
You’ll end up with a new file like below
---
title: "My First Post"
date: 2019-03-26T08:47:11+01:00
draft: true
---
If draft is true, the post won’t be visible in the site. If draft is removed or made false, only then it will be visible.
Finally to start the Hugo Server use below command,
hugo server -D
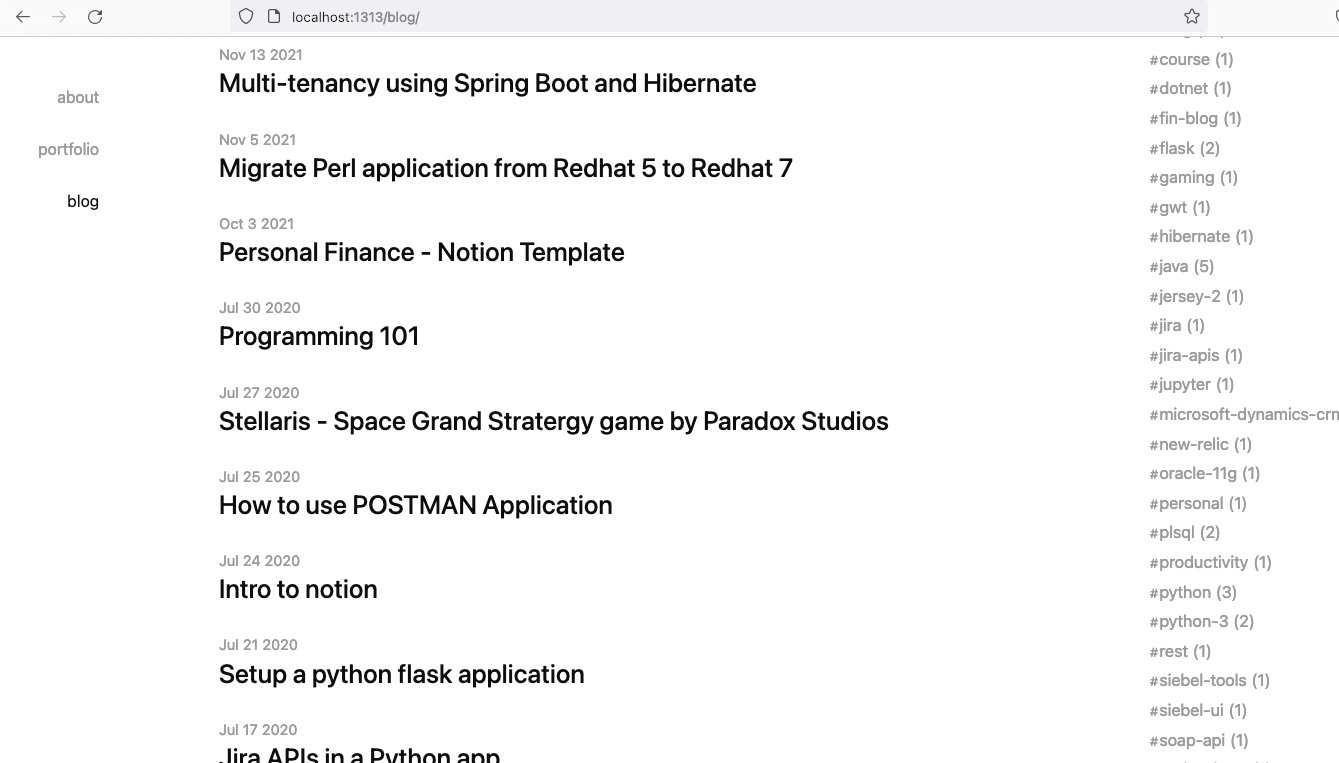
The new site will be at http://localhost:1313/
That’s it! The blog is up and running. Its that simple to setup a blog site using Hugo.
Setup a theme in Hugo
Now lets setup a new theme in Hugo. Go to https://themes.gohugo.io/
Here one can find a list of different Hugo themes and select any one them. There is usually a live Demo as well, so you can see how site will look once its set up.
Lets consider an example them, https://themes.gohugo.io/themes/hugo-theme-codex/
In your Hugo project run below commands,
cd themes
git clone https://github.com/jakewies/hugo-theme-codex.git themes/hugo-theme-codex
Here hugo-theme-codex theme is cloned to themes folder.
Each theme will usually contain an example site folder. Here config.toml file will be present. Copy this to the root location and replace it with existing config.toml file. This file is the configuration for Hugo site.
(Important to note here, in config.toml, theme should be set to the name of the theme that you want to use. For ex: theme = "hugo-theme-codex").
Then Remove below line,
themesDir = "../../"
Then run Hugo server,
hugo server -D
Further configuration for the site can be done in config.toml file. Consider below example for the same,
# DO NOT REMOVE THIS
theme = "hugo-theme-codex"

# Override these settings with your own
title = "Example Blog"
languageCode = "en-us"
baseURL = "http://example.come/" #Provide your site same here
copyright = "© {year}"

# Add your Disqus shortname here.
# disqusShortname = "Example"

# Add your Google Analytics identifier: UA-XXXXXXXX-X
# googleAnalytics = ""

# Optional params
[params]
  # Follow the Hugo date/time format reference here:
  # https://gohugo.io/functions/format/#gos-layout-string
  dateFormat = "Jan 2 2006"

  # Links to your social accounts, comment/uncomment as needed. Icons will be displayed for those specified.
  twitter = "https://twitter.com/example"
  github = "https://github.com/example?tab=repositories"
  email = "mailto:example@gmail.com"
  # facebook = "https://facebook.com/<your handle>"
  # gitlab = "https://gitlab.com/<your handle>"
  # instagram = "https://instagram.com/<your handle>"
  linkedin = "https://www.linkedin.com/in/"
  # youtube = "https://www.youtube.com/channel/<your channel>"

  # Titles for your icons (shown as tooltips), and also their display order.
  # Currently, these icons are supported:
  #   "Twitter", "GitHub", "Email", "Facebook", "GitLab", "Instagram", "LinkedIn", "YouTube"
  iconTitles = ["Twitter", "GitHub","Email","LinkedIn"]

  # Metadata for Twitter cards, defaults to params.twitter
  # twitterSite = "@<your handle>"
  # twitterAuthor = "@<your handle>"

# This disables Hugo's default syntax highlighting in favor
# of prismjs. If you wish to use Hugo's default syntax highlighting
# over prismjs, remove this. You will also need to remove the prismjs
# vendor script in layouts/blog/single.html.
[markup]
  [markup.highlight]
    codeFences = false

  # Set to false to disallow raw HTML in markdown files
  [markup.goldmark.renderer]
      unsafe = true

# Controls the navigation
[[menu.main]]
  identifier = "about"
  name = "about"
  title = "About"
  url = "/"
  weight = -120

[[menu.main]]
  identifier = "portfolio"
  name = "portfolio"
  title = "portfolio"
  url = "/portfolio/"
  weight = -110

[[menu.main]]
  identifier = "blog"
  name = "blog"
  title = "blog"
  url = "/blog/"
  weight = -100
To configure the site’s home page edit in page content/_index.md. To add a new post in the blog folder, run below command,
hugo new blog/:blog-post.md
There are plenty more configurations that can be done with this theme. Please checkout
https://themes.gohugo.io/themes/hugo-theme-codex/
Deploy
Now that Hugo site is ready, we would want to share it with the world. Lets get ready to deploy. So to deploy you’ll need two things,
- Domain name
- Server(Cloud) space
For creating domains, we will use Google Domains and as for the server, we will deploy our site in Netifly.
1. Domain Setup
I prefer google domains over other domain providers but you can prefer any other domain provider.
Go to Google Domains and search the domain name ‘exampletestDec2021.com’. As luck would have it , its available. For this example I’m not gonna purchase.
But once you purchase, the domain is yours for an year.
Here DNS setup needs to be done. But before that we need deploy our site to Netifly(https://www.netlify.com/)
2. Netifly Setup
Netifly allows us to deploy our application for free. It is best suited for static sites.
But before deploying to Netifly, Hugo code needs to be committed and pushed to Github.
This Github login needs to be used to sign up to Netifly.
- Now Go to
SiteTab and add new site - Provide the git provider branch, in this case the Github Hugo branch
- That’s it! the site will be deployed. But the URL will be
Netiflygenerated URL
We want out domain to be the one the we purchased from Google Domains.
3. Connect Domain and Netifly
-
Go to
Netifly→Site Settings→Domain setting -
Open the DNS documenttation of Netifly available at https://docs.netlify.com/domains-https/custom-domains/configure-external-dns/#configure-an-apex-domain
-
We need to set custom records in Google Domains.
-
Open Google domains, and under ‘Custom records’ add
Atype record and set it to Netifly’s load-balancer IP -
In DNS docs of Netifly search for Netifly’s load-balancer. As an example lets consider this as ‘
75.2.60.5’ -
Add this in Google Domains
-
Also add CNAME to Google domain.
-
The settings in Google domains should look something like this
| Host name | Type | TTL | Data |
|---|---|---|---|
| example.com | A | 1 hour | 75.2.60.5 |
| www.example.com | CNAME | 1 hour | example.com |
Finally set the primary domain as your domain ‘example.com’ in Netifly. Under Domains→Custom Domains. This would make your blog available in your custom domain.

4. SSL Certificate setup
Now that website is up and running, we need to include SSL certificate for the site to be a https:// site. This is now become mandatory, if one wants her site to be found by search engines.
SSL certificates are not provided by default and are charged extra by most domains provider.
But luckily we have a free SSL certificate provider called Lets Encrypt. This is a free certificate providing authority.
And best part is Netifly provides an easy way to set ‘Lets Encrypt’. Netifly will handle updating the certificate every 90 days, so we don’t have to.
To set this up. Go to Netifly→Domains and scroll down to HTTPS section. Here you’ll find setting to setup Lets Encrypt certificate.
With all this setup done, the Blog site built on Hugo is deployed. To add new posts, create new post.md file and push toGithub. Netifly will detect the commits and auto deploy to live site.
And that’s it. The blog site is all set and done
Check out my blog on how I created a Saas application in a month here.